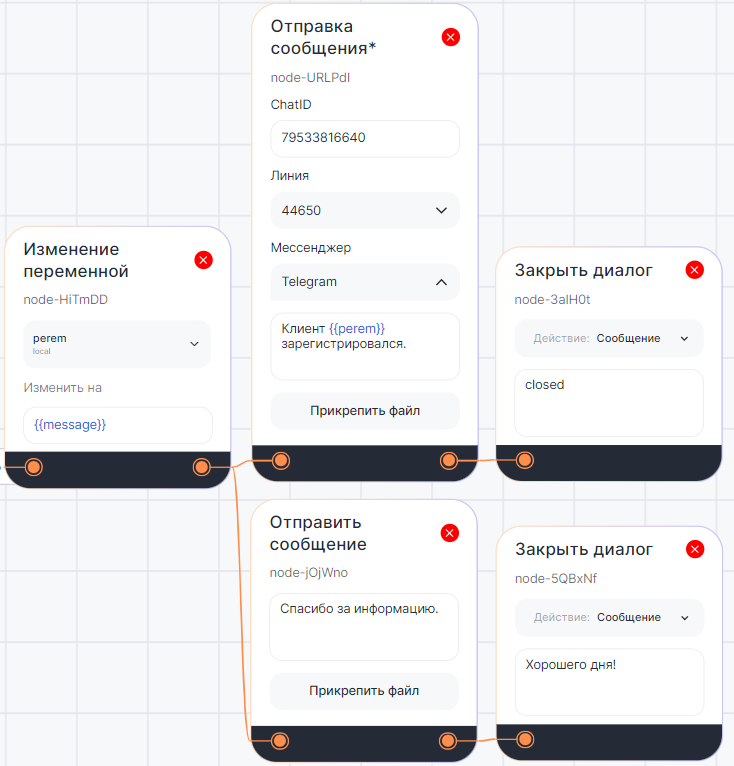
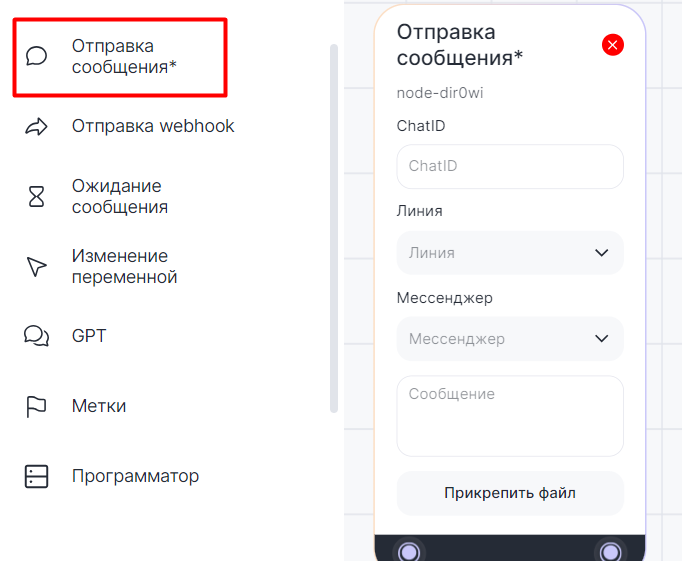
В диалоге бота с клиентом блок «Отправка сообщения*» автоматически отправляет сообщение.
От обычного блока «Отправка сообщения» (без звездочки «*») он отличается тем, что может реагировать на получение запроса через вебхук.
Блок содержит поля:
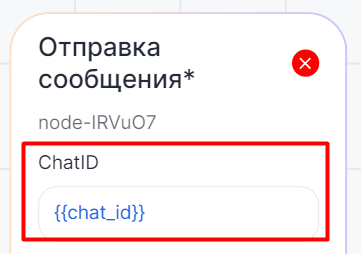
ChatID — номер телефона, username или e-mail адресата, в поле можно ввести переменную.
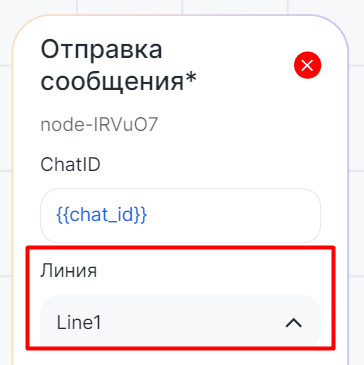
Линия — с которой отправится сообщение.
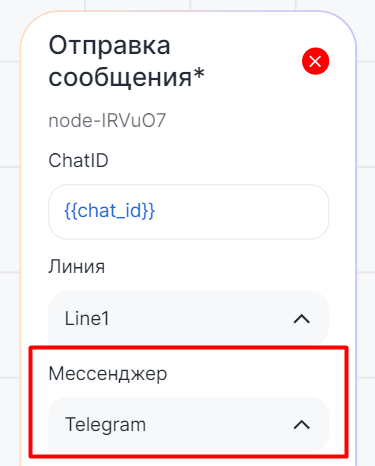
Мессенджер — в который нужно отправить сообщение.
Сообщение — обязательное поле для ввода сообщения. Если оставить пустым, то блок не сработает и сценарий не запустится. 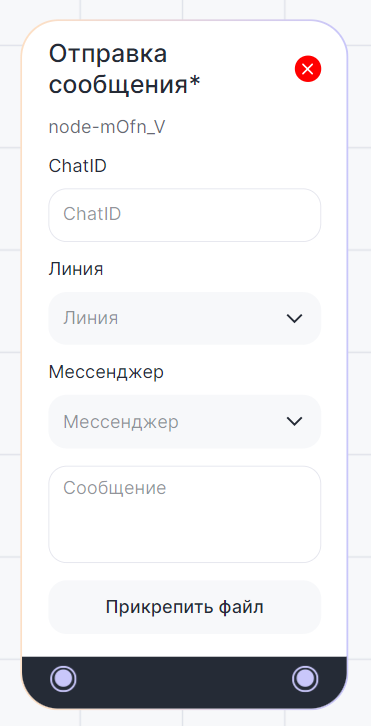
В сценарии с реакцией на запрос вебхук «Отправка сообщения*» используется с блоком «Входящий webhook». Например, если нужно отправить сообщение при перемещении карточки в CRM-системе. В таком сценарии блок «Входящий webhook» автоматически передает значение в поле «ChatID» из CRM-системы через переменную.
В диалоговом сценарии блок может понадобиться, чтобы отправить сообщение в определенный чат или мессенджер. В таком сценарии его можно использовать с блоком «Стартовый блок» и заполнить поле «ChatID» вручную.
Важно: блоки «Отправка сообщения*» и «Отправка сообщения» можно использовать в сценарии одновременно.
Настройка блока «Отправка сообщения*»
С блоком «Входящий webhook»
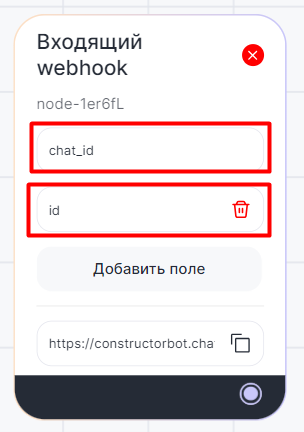
1. В Конструкторе ботов выберите «Вебхук» и добавьте блок на рабочую область.
2. Создайте поля и добавьте параметры, которые будут передаваться. Например, создадим два поля chat_id — номер телефона, email или username клиента и id — идентификатор карточки CRM.
3. В нижней части блока сгенерируется ссылка — она понадобится для настройки вебхук в стороннем сервисе, например, Битрикс24.
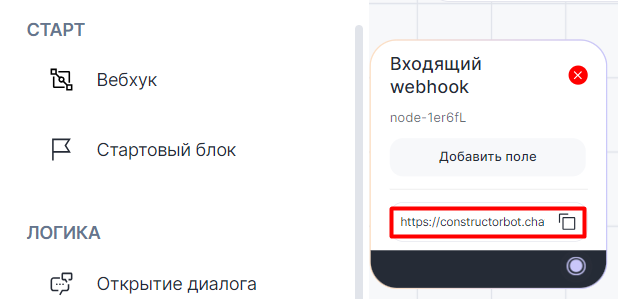
С параметрами, которые мы указали в прошлом пункте, ссылка будет выглядеть так:
https://constructorbot.chatapp.online/api/request/?token=сгенерируется автоматически&chat_id=&id=
4. Добавьте блок «Отправка сообщения*» на рабочую область.
5. В «ChatID» введите переменную с данными адресата. В нашем примере это {{chat_id}}.
6. Выберите линию, с которой нужно отправить сообщение.
7. Выберите мессенджер.
8. Введите сообщение, которое нужно отправить.
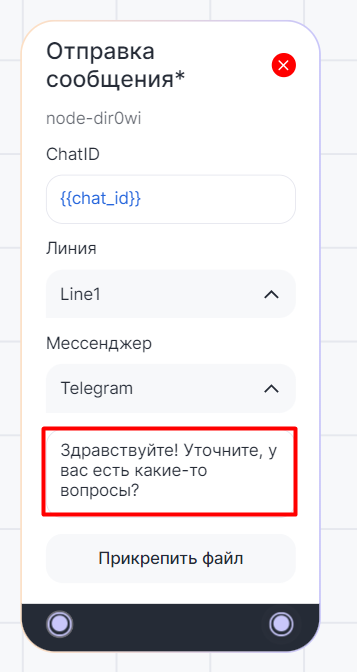
9. Поместите блок «Отправить сообщение*» в сценарий и соедините с другими блоками.
10. Введите название сценария и нажмите «Сохранить» и «Опубликовать».
11. Теперь нужно перейти в сервис, который будет отправлять запрос, и настроить в нем исходящий webhook. Процесс настройки может отличаться в зависимости от сервиса. Для примера посмотрите нашу статью Webhook Битрикс24.
С блоком «Стартовый блок»
1. В Конструкторе ботов выберите «Стартовый блок» и добавьте на рабочую область.

2. Добавьте блок «Отправка сообщения*» на рабочую область.
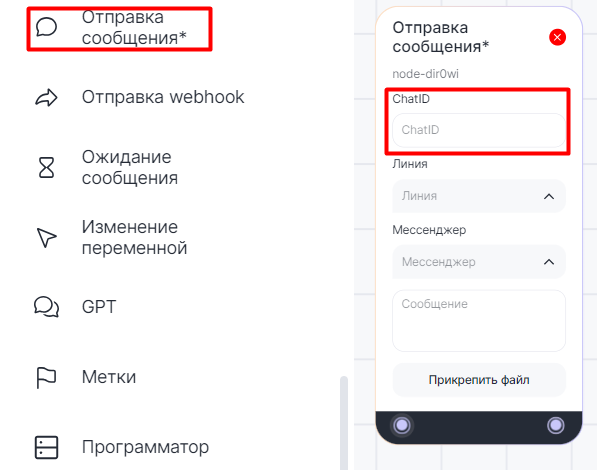
3. Введите ChatID.
Его можно взять, например, из чата Dialogs.Pro. Для этого нажмите на иконку собеседника в нужном диалоге и скопируйте «Chat ID».
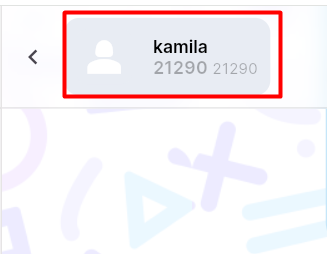
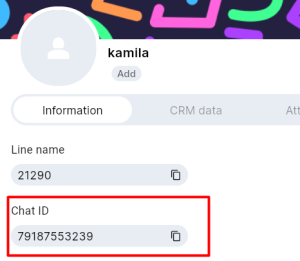
4. Выберите линию и мессенджер. 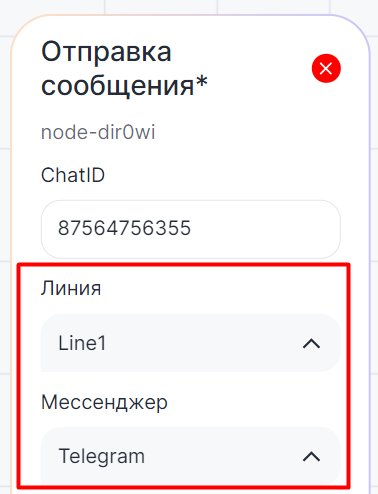
5. Введите сообщение, которое нужно отправить.
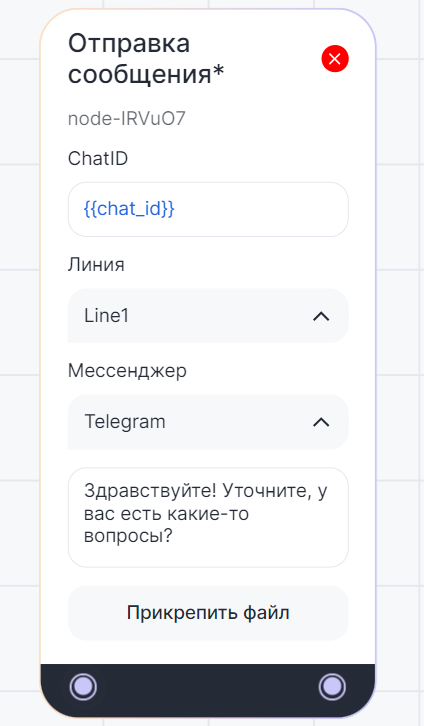
6. Поместите блок «Отправить сообщение» в сценарий и соедините с другими блоками.
Отправка файла
Нажмите «Прикрепить файл», чтобы отправить клиенту текст или документ. Подробная инструкция в статье Отправка файла по URL.
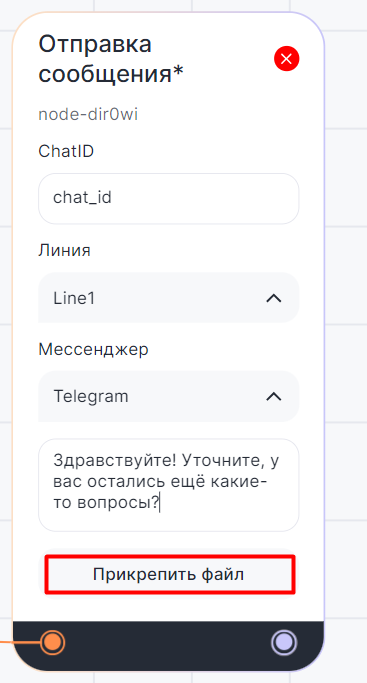
Пример сценария в Конструкторе ботов
С блоком «Входящий webhook»
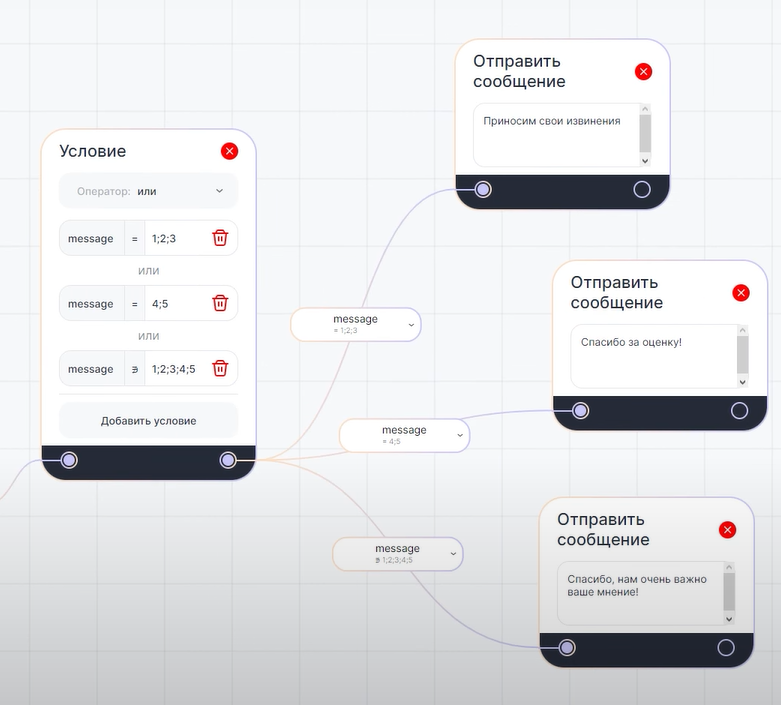
Блок «Отправка сообщения*» может понадобиться, например, чтобы при перемещении карточки сделки в CRM-системе клиенту отправлялось сообщение с запросом оценки.
В приведенном ниже сценарии:
1. При перемещении карточки сделки в CRM-системе бот отправляет клиенту сообщение с запросом оценки.
2. В блоке «Условие» указаны три варианта развития сценария в зависимости от выставленной клиентом оценки.
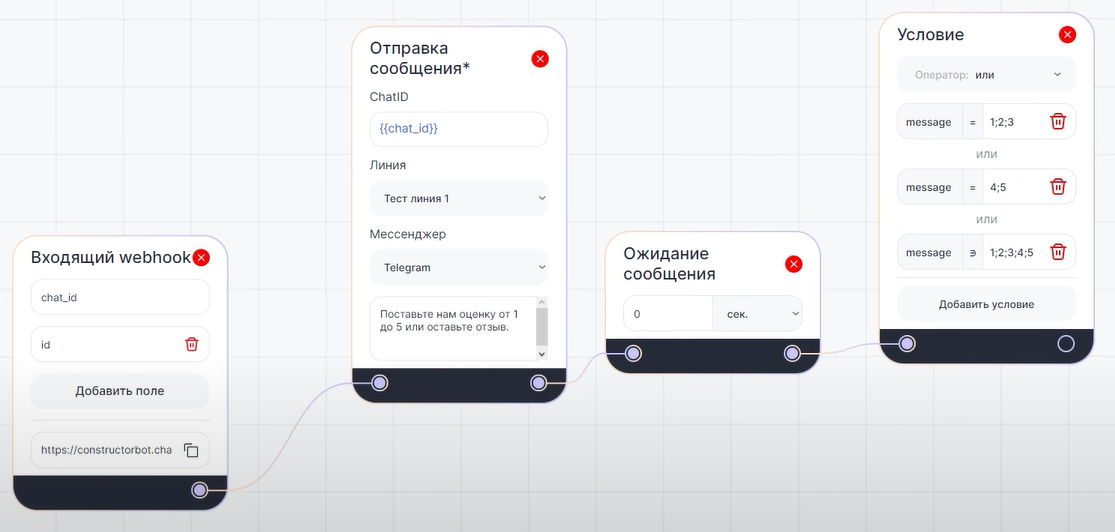
3. Если клиент поставил оценку 1, 2 или 3 — бот извиняется. Если 4 или 5 — благодарит за оценку. Если клиент оставил комментарий — бот благодарит за обратную связь.
С блоком «Стартовый блок»
Блок «Отправка сообщения*» в диалоговом сценарии может понадобиться, например, чтобы при регистрации клиента отправить сотруднику в чат уведомление.
В приведенном ниже сценарии:
1. Бот уточняет номер телефона для регистрации.
2. Номер телефона записывается в переменную {{perem}}. 
3. Сотруднику в Telegram отправляется уведомление о регистрации клиента.
4. Бот благодарит клиента за информацию.
5. Диалоги с клиентом и сотрудником закрываются.
