Email newsletters help you to attract, retain and convert potential clients into loyal buyers. Personalised messages and offers motivate clients to make a purchase and help your company to maintain a relationship with them.
To send emails without restrictions, companies connect the SMTP protocol. It will deliver the email to each user so that nothing gets lost along the way! To find out what are the ways to connect SMTP protocol go to the end of the article. And now we will show you how to connect a third-party email service and how Email newsletters work in ChatApp.
Connecting an Email Channel to a ChatApp line
Communicate with clients by mail using the Email channel. Inform clients about updates and special offers.
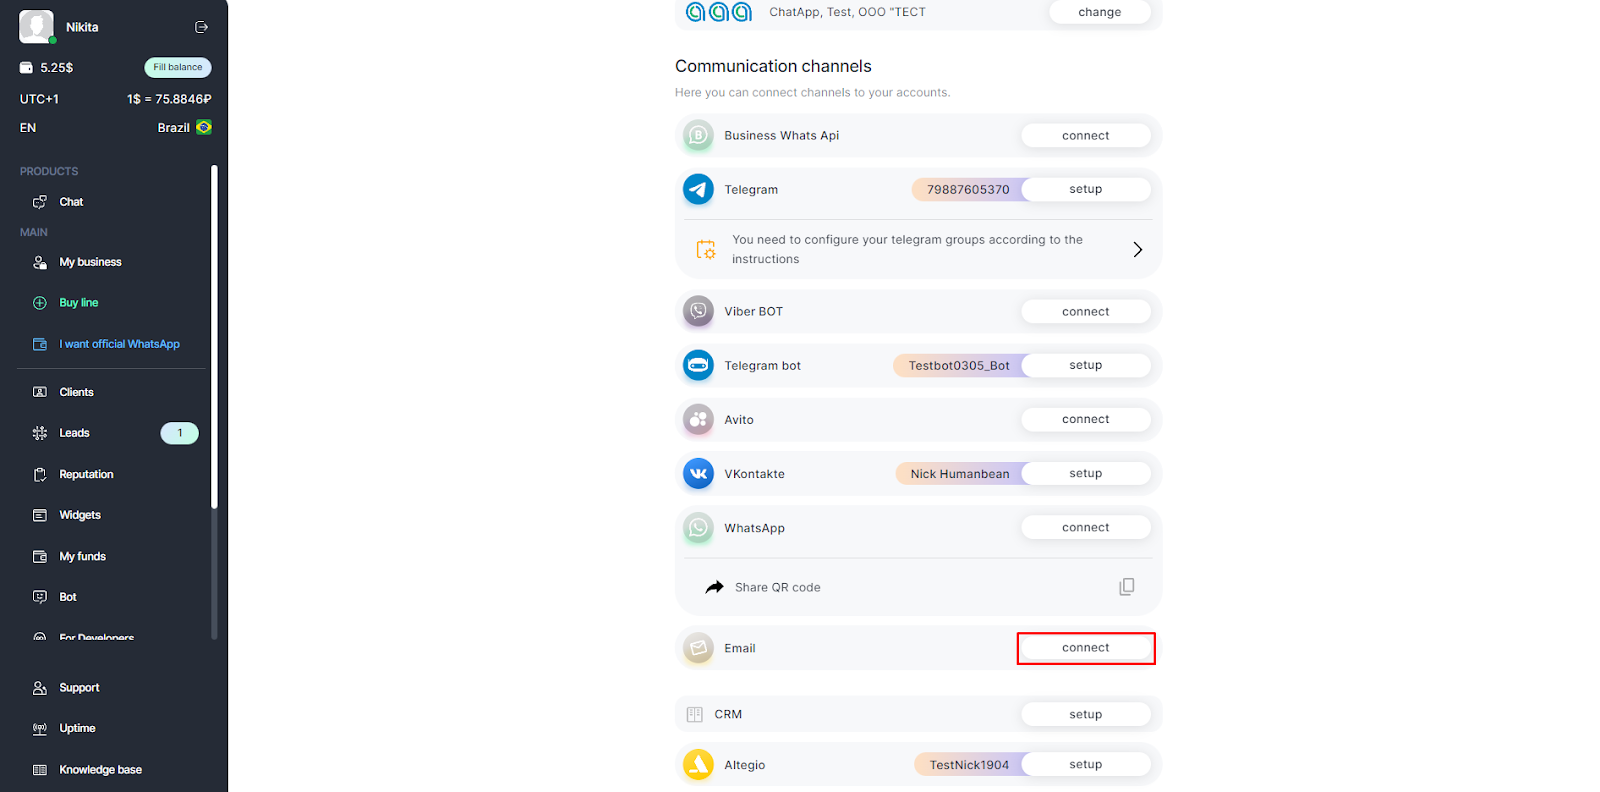
1. Go to “My Business” section and select a line with the Email channel.

2. Find Email in communication channels and click connect.
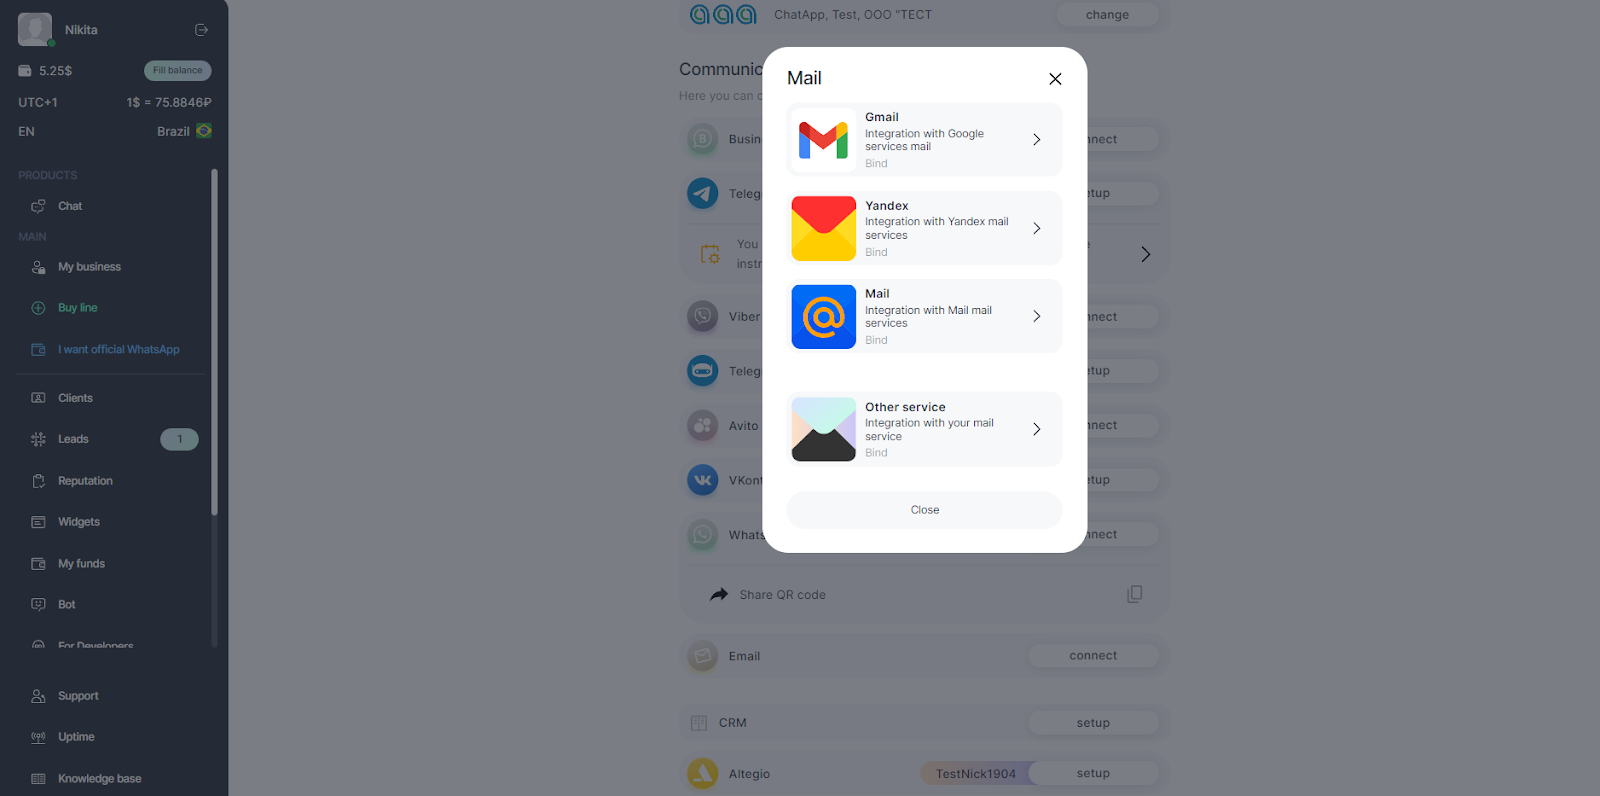
3. Select “Other service”.
4. Allow access to the mailbox using mail clients in the mail service. If you cannot find the SMTP and IMAP settings in the mail service, please contact the technical support of the service.
We recommend using a third-party SMTP protocol provider: this way you can do bulk newsletters and there is less chance that your email will end up in spam.
5. In the "Email" field, enter email and click the icon 
6. In the IMAP section, in the "Username" field, enter your email, and in the "Password" field, enter your password.
7. If you are using a free service and click on the icon
But if you choose to use a third-party SMTP provider, change the "Hostname" to the SMTP address provided by your provider.
8. In the SMTP section, in the “Username” field, enter the email address and in the “Password” field, enter the application password.
9. Click "Verify connection".
10. After a short pause, click "Connect".
Read more about connecting Email channel in the article.
Email feed in your ChatApp personal account
Create a new newsletter, add email addresses and client names and use variables to communicate effectively with your clients.
1. From the left menu, select "Work with customers".
2. Click "Newsletters."

3. Click the email icon to create a new newsletter.

4. In the "Name" field, write the name of the newsletter.
5. In the "Work Days" section, select the days and times of the active mailing.
6. Specify the start and end date of the newsletter to ensure that clients receive emails on time.
7. In the "Send range" section, select a delay when sending emails: this way you can avoid blocking when sending numerous emails.
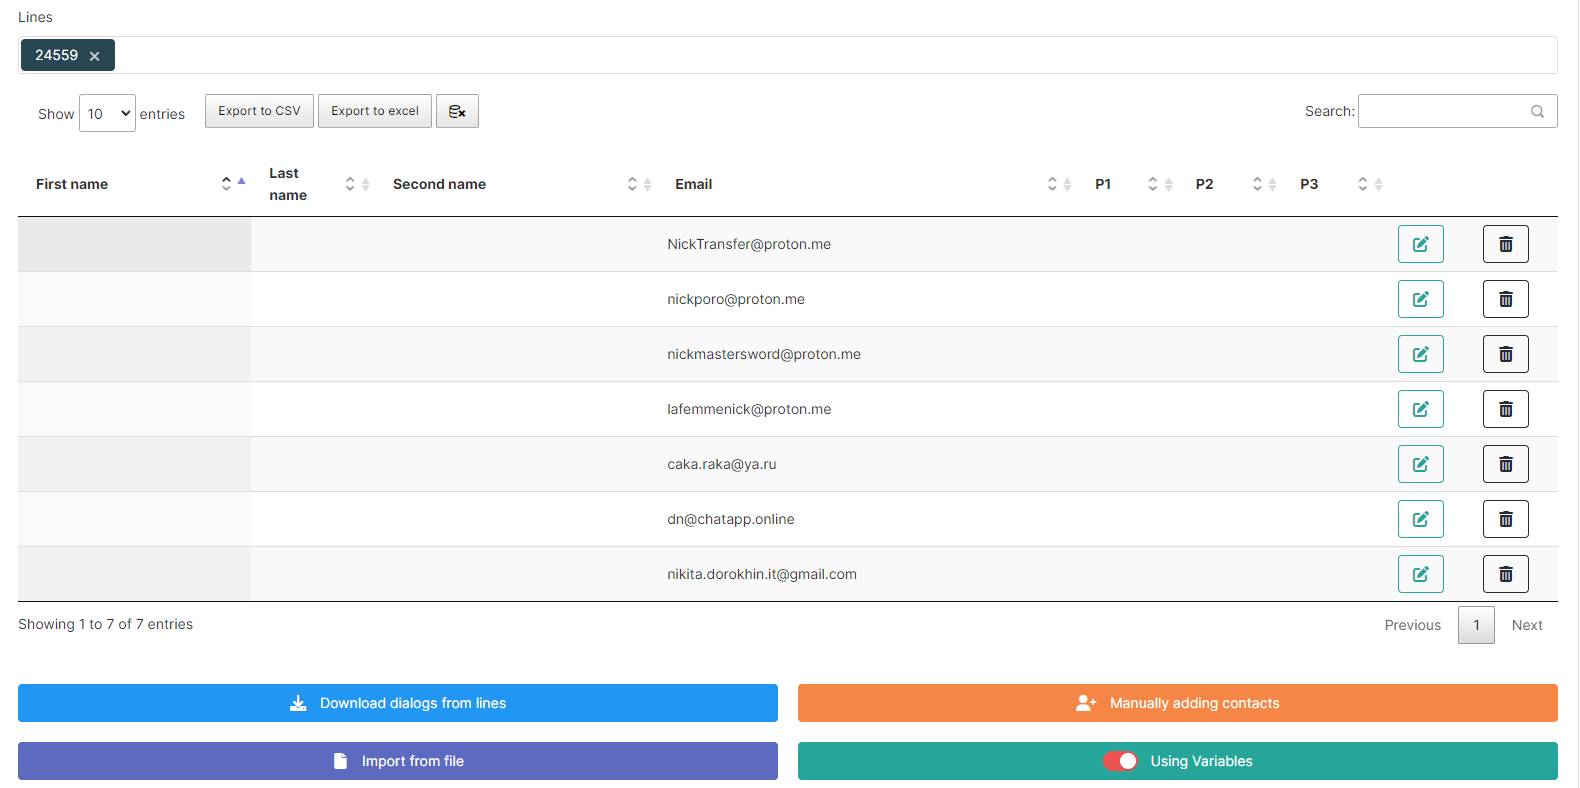
8. Select the line from which you want to download the list of Email addresses for distribution.

There are several ways to add email addresses to the newsletter.
- Click "Download dialogs from lines." The Email addresses you have already exchanged messages with in the ChatApp Dialog will be added.
- Click "Import from File" — this will open a prompt for what the data document should look like. It should be in Excel or CSV format. Write addresses, first names, last names and add parameters for each of the contacts.
- Click "Manually Add Contacts" and enter the Email address of the contacts, each new contact on a new line.
Click "Export to CSV" or "Export to Excel" to get the contact list as a separate file.
Click on the 
9. Enable the use of variables: a field will open up for the variable name and text for it. This will help to add originality and personalize the newsletter. For example, the [firstName] parameter will address clients by name.
10. In the "Text used in the mailing" field, enter the Subject of the message.
11. In the box with the text editor, enter the newsletter message.
12. Attach the file to be sent in the mailing.
13. Click “Save”.

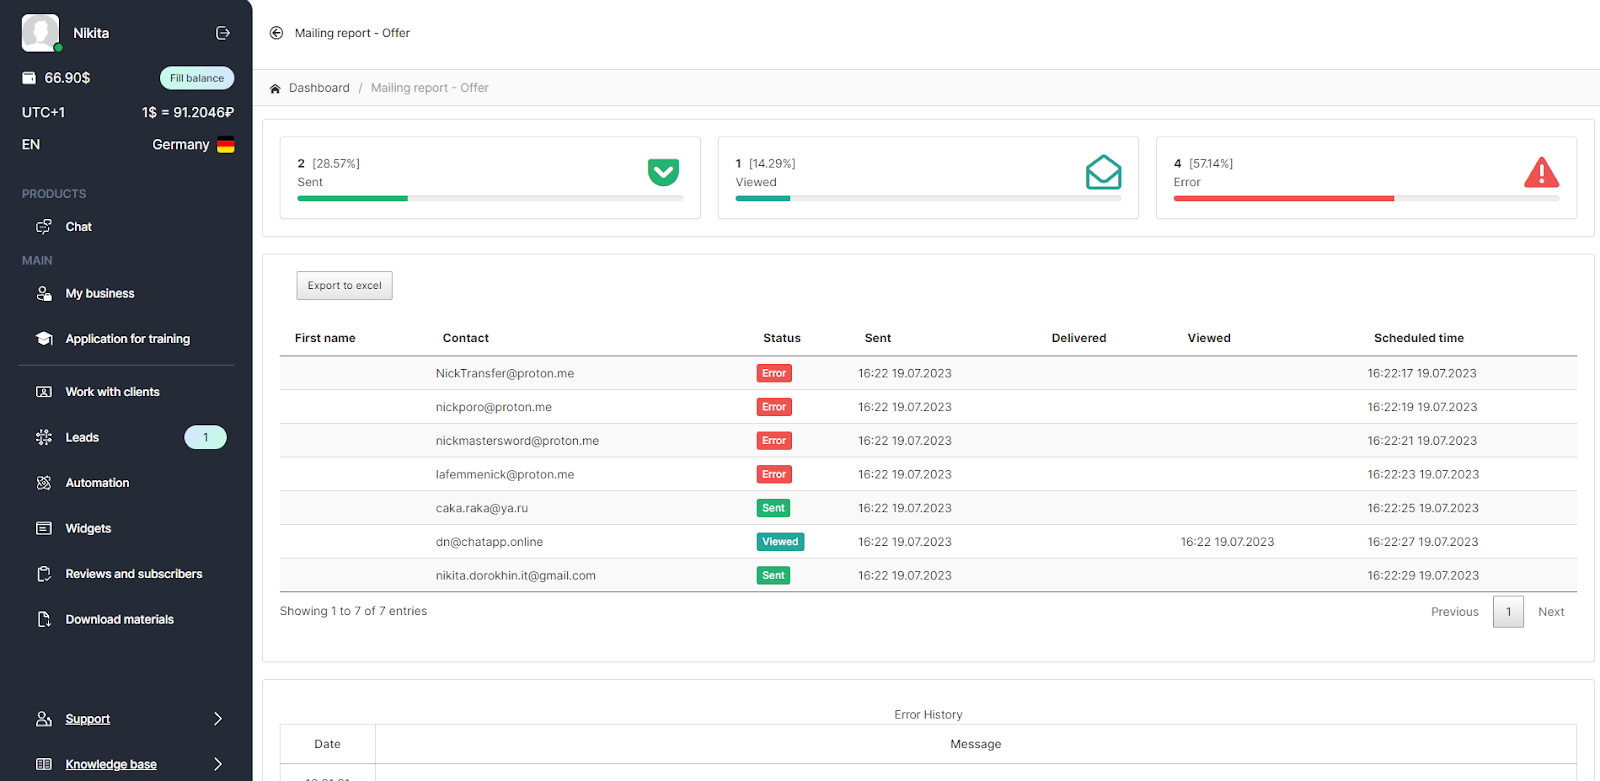
Newsletter result - statuses of sent messages
It is up to you to decide when to send the messages. After sending, messages may remain in the delivery process for some time.
Message statuses:
- awaiting;
- sent;
- delivered;
- viewed;
- error
In the distribution list, select the icon to view statuses:
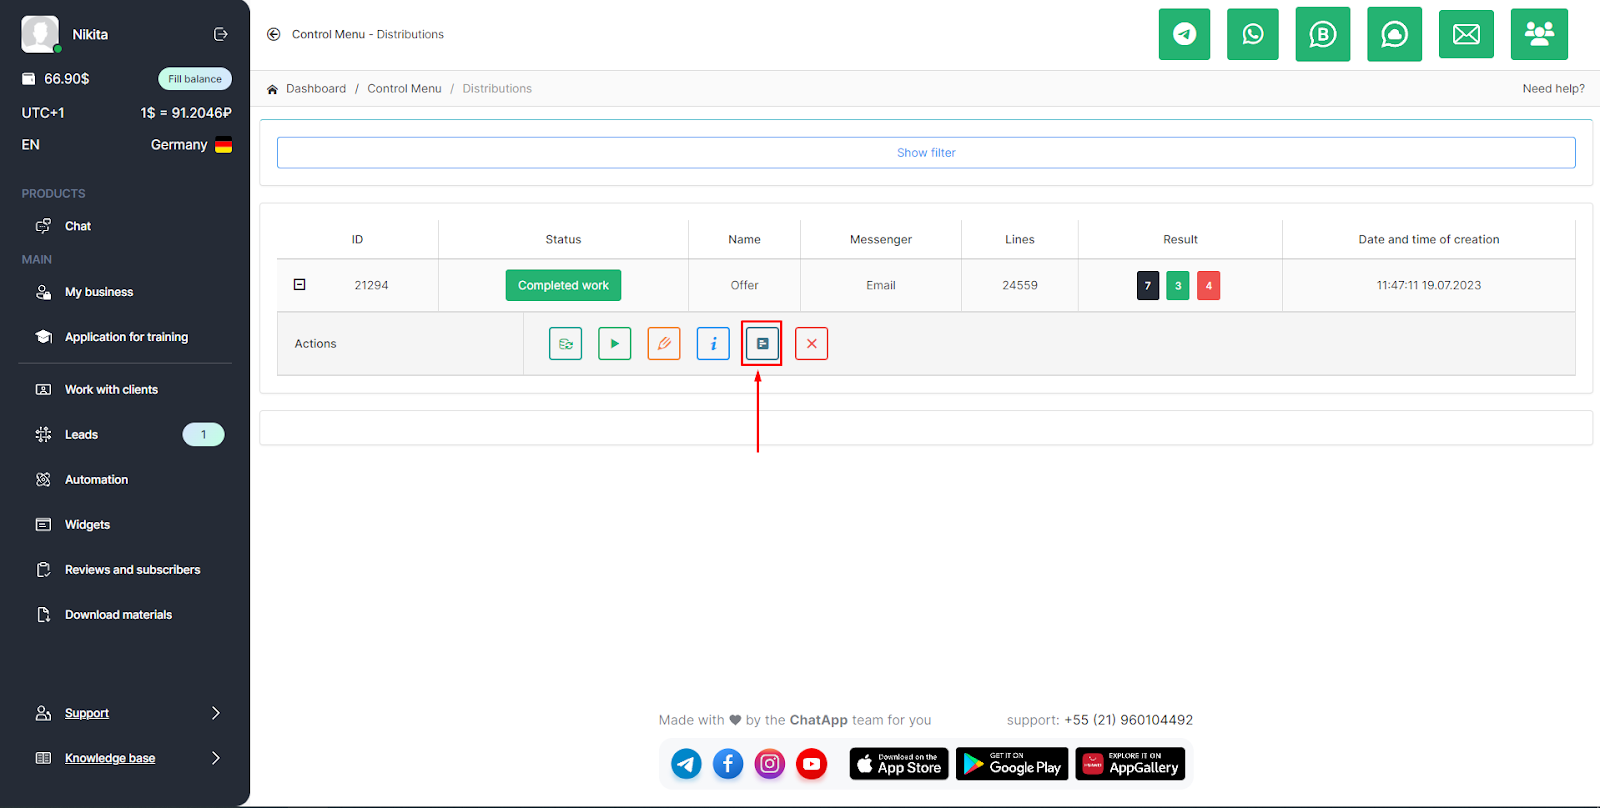
This is what the newsletter status report looks like: