Создание и настройка бота Запись к специалисту
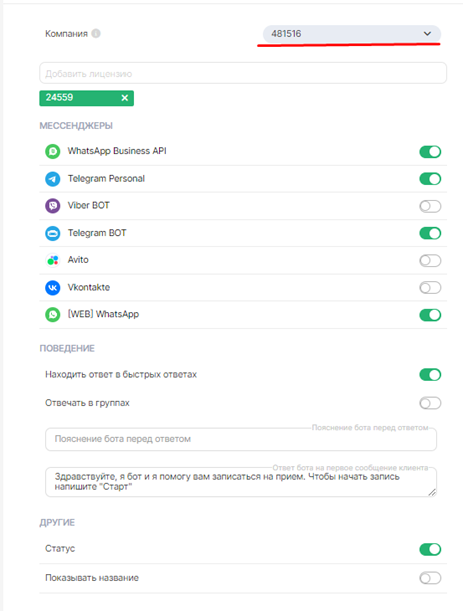
1. Выберите, в каких линиях будет работать бот. Убедитесь, что к ним привязаны выбранные мессенджеры:
2. Выберите компанию, к которой будет привязан бот.
3. Включите опцию «Статус» — это кнопка включения бота внутри настроек.
4. Включите опцию «Показывать название», чтобы клиенты видели название, которое вы дали своему боту.
5. Создайте условия:
- «Автозакрытие диалога» и включите опцию «Закрывать диалоги, созданные автоматически»;
- «Сбор информации» и запросите номер телефона у клиента;
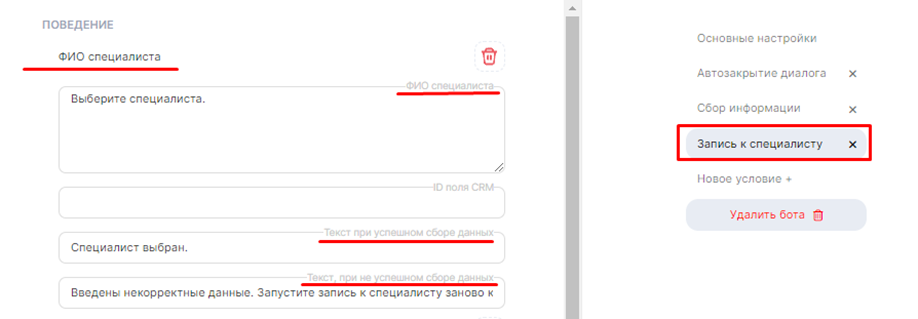
- «Запись к специалисту»: в окне «ФИО Специалиста» нужно написать фразу, которая будет отображаться в боте, когда клиент выбирает специалиста. Например: «Выберите специалиста»;
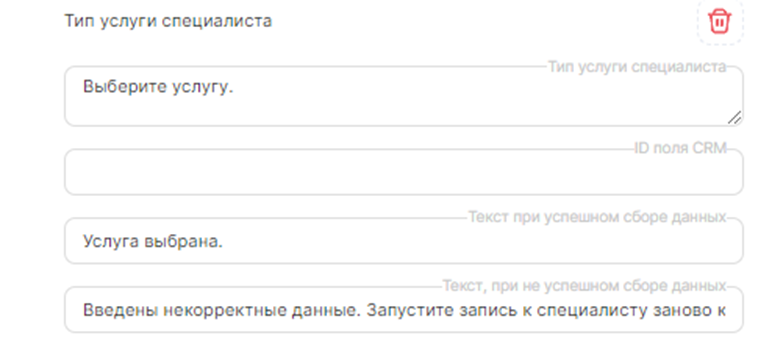
- Добавьте параметр «Тип услуги специалиста» — введите фразу, которая будет отображаться в боте, когда клиент выбирает услугу. Например: «Выберите услугу»;
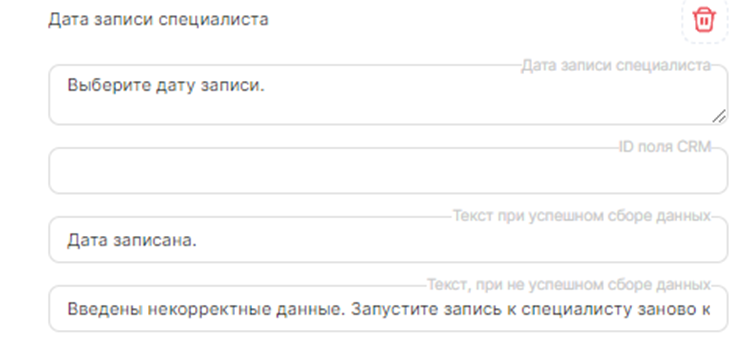
- Добавьте параметр «Дата записи специалиста» — напишите фразу, она будет отображаться в боте, когда клиент выбирает дату записи, например: «Выберите дату записи»;
- Добавьте параметр «Время записи специалиста» — напишите фразу, она будет отображаться в боте, когда клиент выбирает время записи, например: «Выберите время записи»;
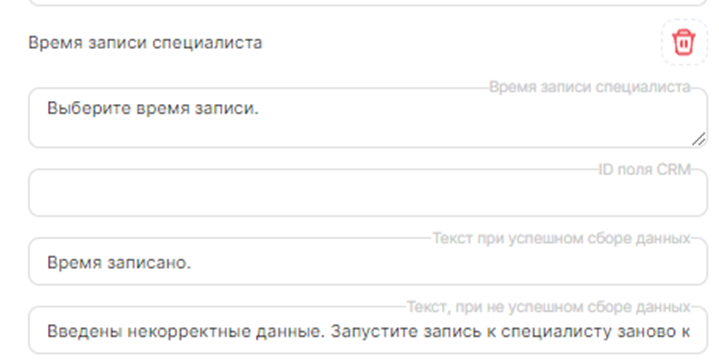
- В окнах «Текст при успешном сборе данных», напишите, что клиент правильно выбрал услугу, специалиста, время или дату;
- В окнах «Текст, при не успешном сборе данных» напишите, что данные введены неправильно, и подскажите клиенту как запустить запись по новой. Например: «Введены некорректные данные. Запустите запись к специалисту заново написав Старт.»
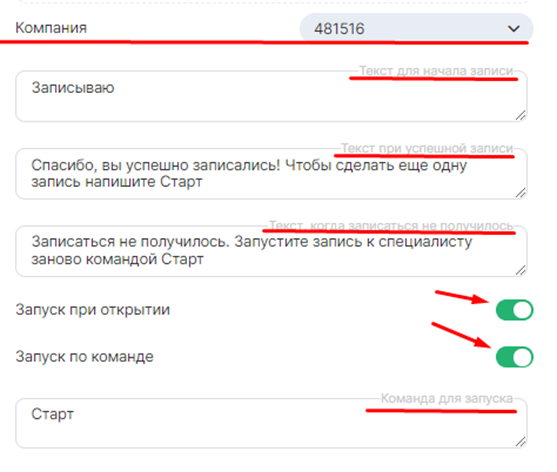
6. Когда все параметры добавлены, выберите компанию.
Важно: Компания должна быть привязана к вашему филиалу в YClients и совпадать с основными настройками Бота.
- В окне «Текст для начала записи», напишите, заголовок для всего процесса записи на прием;
- В окне «Текст при успешной записи», напишите, что клиент успешно записался на прием и как клиент может начать новую запись. Например: «Спасибо, вы успешно записались! Чтобы сделать еще одну запись, напишите Старт.»;
- В окне «Текст, когда записаться не получилось», напишите, что у клиента не получилось записаться, и подскажите ему. как начать процесс записи заново. Например: «Записаться не получилось. Начните запись к специалисту заново командой Старт.»;
- Включите опции «Запуск при открытии» и «Запуск по команде». Первая опция позволить начинать чат, как только диалог откроется. Вторая опция позволит запускать запись по команде;
- В окне «Команда для запуска», напишите слово или фразу, после ввода этой команды у клиента начнется запись на прием.
Пример работы бота «Запись на прием»
При написании на номер, к которому привязаны ваши мессенджеры, вы будете получать ответ Бота:
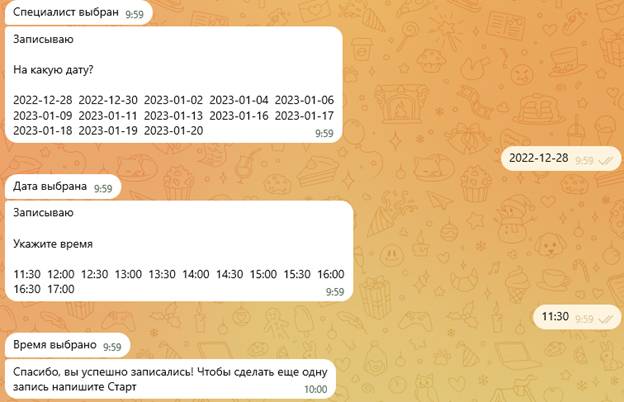
Если на каком то из этапов записи ввести неверное значение, настроенный Бот подскажет, как начать запись заново.
Обязательные условия для Записи к специалисту ботом
Боту нужно обязательно настроить сбор обязательных полей:
- номер телефона клиента во вкладке «Сбор информации»;
- ФИО специалиста;
- Название услуги, дату и время.
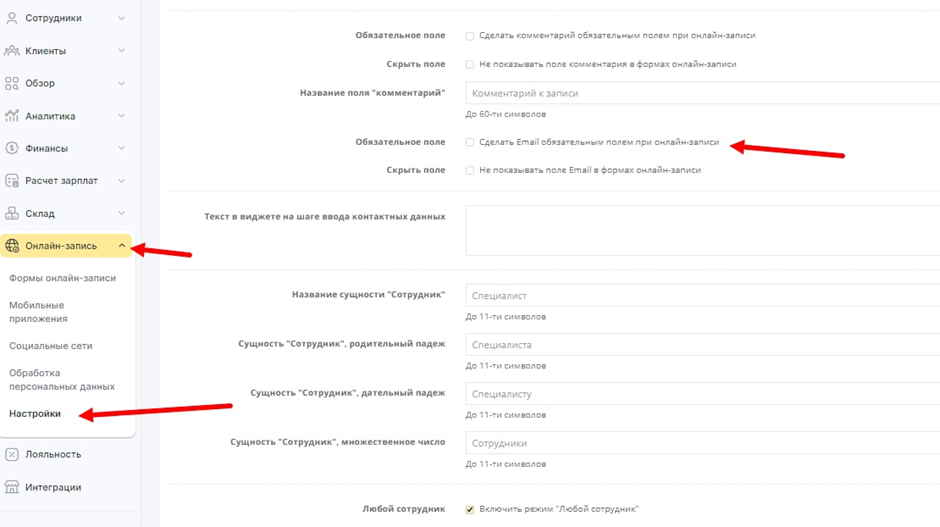
Если бот не запрашивает почту клиента, то в кабинете Yclients нужно отключить галочку.
«Онлайн-запись» -> Настройки -> обязательном поле «Сделать Email обязательным полем при онлайн-записи».
